


I'm up on the Crate Paper blog today sharing another fun mini album! This time it's a travel related album using the new Open Road collection! Lots of yummy papers and embellishments!!
Spring and summer traveling is always so exciting. The trees are in full bloom, the grass is green and you can almost smell the relaxation in the air! We have a few family adventures planned this year, as well as some fun trips for just my husband and I and documenting them is one of my favorites!
Before my trips, I always like to have an idea of how I want to document our adventure. Sometimes I will add an insert into our Project Life album, but often I put together a mini album. Pre-planning a travel journal can be such a wonderful way to enjoy your trip while also documenting those little memories. Having a pre-made album that you carry with you on your trip lets you record those memories as they happen, rather than afterwards. I also like to use the journal as a place to reflect about my life and the things that are going on. There's nothing like a relaxing vacation to open up your mind and heart.

For the base of my album, I am using the Open Road accordion mini album. I love the patterns and colors and all the "extras" that are included as part of this mini, like the little paper clips and pockets.
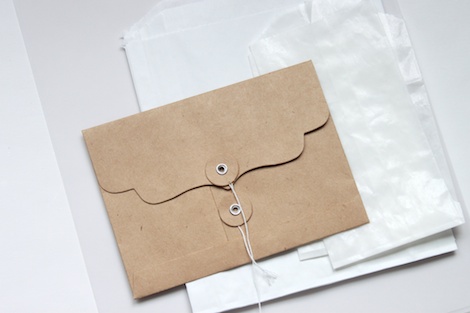
I have also gathered together a few envelopes, glassine bags, paper bags and vellum to create some additional pockets for my journal.

Instead of using the album as an accordion album, I cut between each page, leaving me with five beautiful front/back pages.

Using some of the patterned paper from the Open Road collection, I created a flip out page where I could add additional photos or journaling. I wanted to make sure there was plenty of room for variation as I was making the book and didn't want to have to commit to a photo size or idea before I had my photos and memorabilia.

To add extra bits and pieces to my journal, I trimmed apart the Open Road Cut-Outs paper. These pieces together create their own little embellishment pack and are perfect for any travel journal!!
I like to sew or staple on any additional tags or cards prior to binding my book together. You will see that I've included many of these tags as accents throughout the journal. I'll keep all the extras together and will include those to my book when the photos and journaling has been added.

Using a piece of vellum, I created a transparent pocket for the end of my journal. Right now, I have a few pretty cards and tags in there, but I know it will soon be full of memories from our trip!

Now that all of the pages and pockets are made, my book is ready to be bound. I'm using my Bind-it-all, but you could easily use book rings or ribbons to bind your book.
Let's take a look at my pre-made travel journal!


The "Going Places" tag from the Open Road "Cut-Outs" paper was the obvious choice for my title. I added an open frame, a piece of map paper, vellum and a pretty sticker flower to finish the front.


Scattered throughout the book, I've included paper bags, envelopes or pockets. I love being able to tuck in pieces of memorabilia or journaling throughout my trips and pockets make this so easy.

For this bag, I stapled an Open Road banner across the top for a pop of color.


I've also added in smaller pieces of paper and cards in-between the pages. I love having a messy book and the varying pages keep it fun and playful.


Here, I sewed a piece of notebook paper to one of the base pages of the book to create another pocket. I plan on adding journaling onto the notebook paper and then tucking in little pictures and epherema in the pocket.


My travel journal is all done! Now I just have to count down the days until I can fill it in with photos and memories!
Just lovely! I especially love the sewn vellum pocket. Will have to try one of those...
ReplyDeletesuper cute, yet another gorgeous CratePaper collection! I usually wait till after i've printed my photos to put together a mini, otherwise i always feel like maybe the colors won't match or something ;)
ReplyDelete