


As I was photographing this spread in my Project Life album (and staring at my toes), I decided to play around with my camera and show you how I take my completed Project Life photos AND also why I take my photos in manual mode.
Before I get started, though, I just wanted to share that I definitely DO NOT consider myself a photographer. I take pictures. Usually of my kids and pretty papers. That's about it. I do, however, really love taking photos, setting up shots and finding pretty light. Everything I know about my camera and photography, I taught myself by trial and error.
MY CAMERA
I have a Canon T1i. I purchased it as a kit camera from Costco about 4 years ago and have greatly enjoyed it! It gives me the freedom to shoot in manual mode, and that's what I love most. I might upgrade one day, but we shall see.

For the most part, I set my photos up as you see in the above two pictures. I use a large white foam board (that I ordered from Amazon, but you can find them at Target or office supply stores), a stool to stand on, some pretty light and my camera. I've really paid close attention to my room and know when it gets the best light. Morning light isn't good because it's too harsh and anything after 4:00 p.m. gives a blueish-tint to my photos that drives me batty. Anytime between 11-3:30 is pretty perfect in this room. To the right in the photo above, I have two large windows, and you can see how I set my white board up a few feet from my wall. I always make sure that my board is outside of any direct sun rays. And I also try to position my board so I don't see any harsh shadows on my projects (this applies more to scrapbook pages where you have lots of layers and depth).
I then lay my spread down on the white board trying to center it in the middle. I always stand behind my board (to not cast a shadow on my project), and I always photograph my spreads (or any project, really) with them facing the sun (so it's usually upside down to me). By facing them towards my windows, I'm (hopefully) eliminating any shadows or overcasts on my project.
Then I focus and take my photos.
I use the lens that came with my camera. While I love my 50mm lens, I have a difficult time getting a good focus inside. My kit lens is usually pretty good as long as I have good light.
MANUAL MODE
So I mentioned previously that I only shoot in manual mode. It took me a while to feel comfortable enough to do that because it does require me to pay attention to details and settings (ISO, shutter speed, aperture, exposure...). BUT...I wouldn't have it any other way. You probably know that I like my photos bright and light, and shooting in manual mode is the only way I've found to do that (without having to do lots of post processing).
When I take my photos, the main thing I change is my light meter, or exposure. I'm basically "over-exposing" my photos. BUT...the thing you have to remember about exposure is that it's totally dependent on your light source. If I'm outside on a pretty day, or even on a cloudy day, I'm less likely to play around with my exposure (maybe just a little). If I'm indoors and am trying to get as much light as possible, I'm definitely playing around with my exposure. My goal isn't to over-expose or make my photos seem unnatural. My goal is to make them look like they do to the naked eye (and I have really good eyesight, so maybe I see things naturally a little over-exposed. Who knows?).
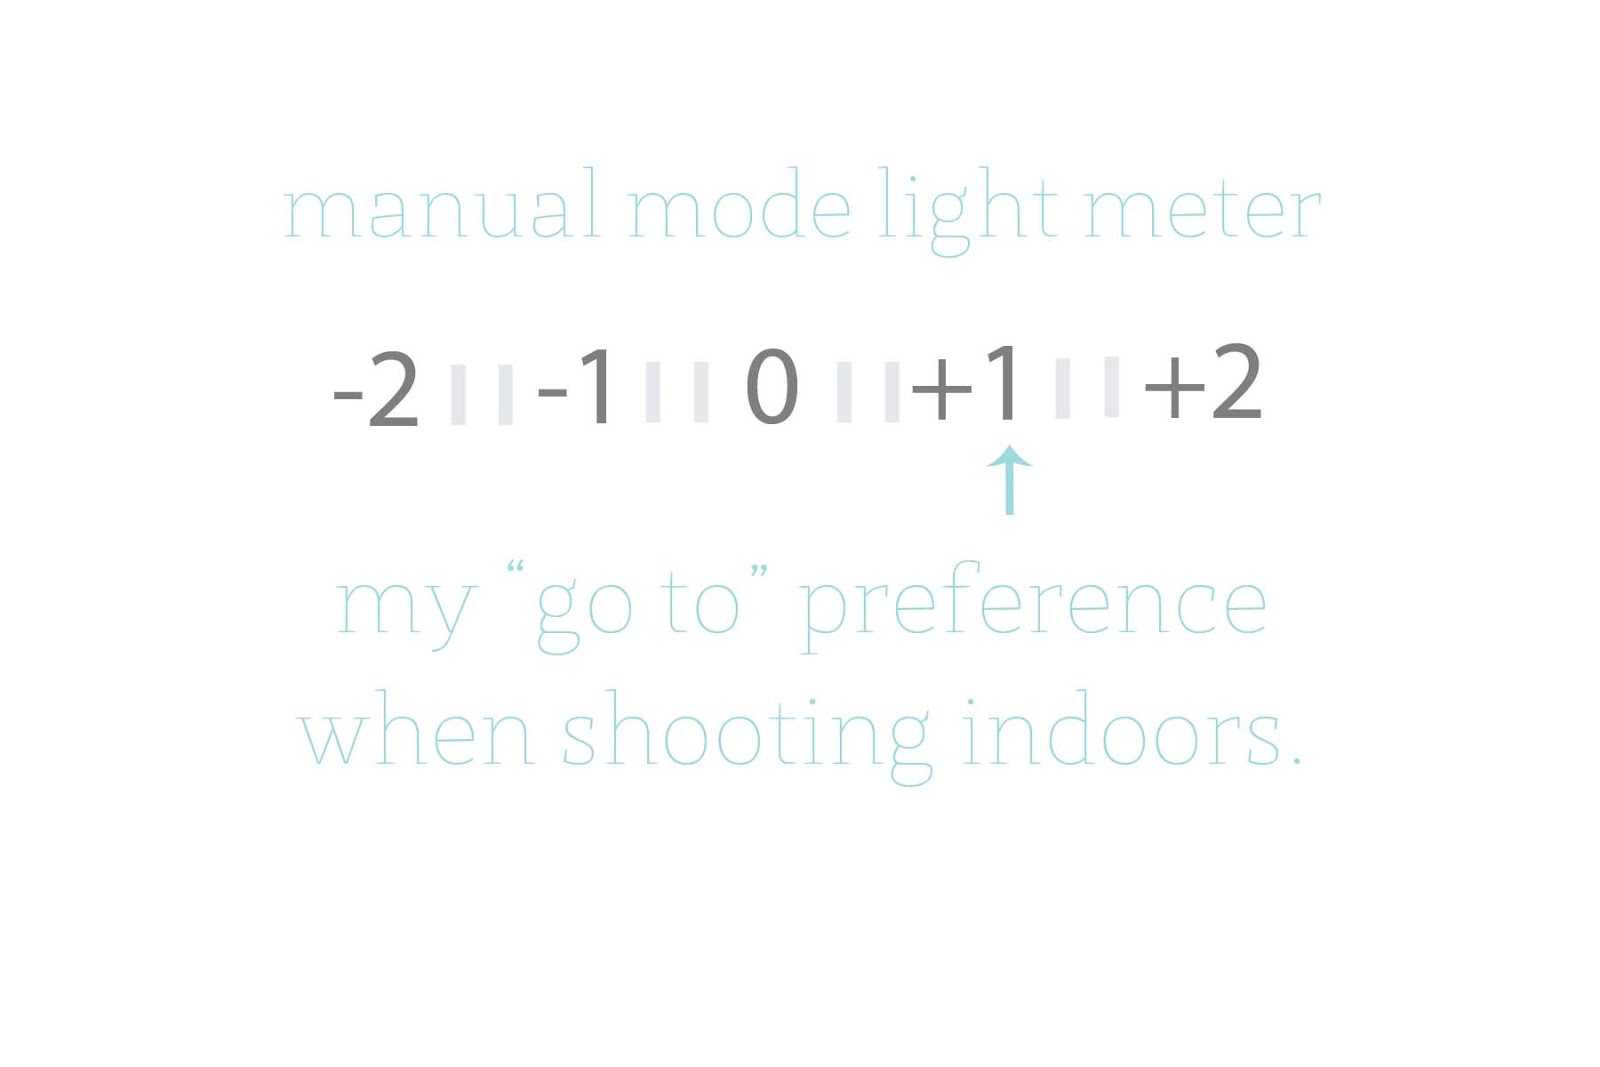
Below are a few examples of what I'm talking about and why I choose to play with my light meter as I photograph.

This photo was taken at "0", or basically the setting my camera would be on if I used the automatic settings and let my camera do all of the work. It's so dark. Like really dark. My room was so bright and light, and this is just not what I was looking down on.
Ok...so let's bump it up a little.
(Get out your manual and play around to see how to do this...)

The light meter is divided into thirds, so I increased my exposure by 1/3.
Nope. Can't do it. It's still way too dark.

And another increase...
It's a little lighter, but still not the same as what I'm seeing with my naked eye.

Now I'm at +1 on my light meter.
My white board is actually looking white, instead of grey and the colors on my project are starting to pop a little.
Let's go up a little more to see what happens...

I've increased my exposure a little more and you see the board is brighter and whiter. It looks pretty decent from this photo, but when I uploaded it to my computer, it was actually a little too blown out for my liking.
So...I went with the +1 exposure photo, cropped my image, removed the color cast (that's the grey undertones you see in the above photo...I can share more about this if anyone is interested) and tweaked my exposure just a wee bit in Aperture and then uploaded it to my blog.
Here is a look at my cropped spread...

That's why I shoot in manual mode. Because I want to have the control over the light and brightness of my photos. I want them to look like I see them, not like how my camera thinks they should look.
If you have never ventured out of automatic, I highly recommend it! Get out your manual and read about your settings. Play around with your camera and take a million photos just to see what happens. I suggest starting out with still objects. Busy kids make for blurry photos, and that can be frustrating when you are trying to learn. Starting with objects around your house, or even your projects would be the perfect place to begin!! Good luck! Let me know how it goes!
ooohhh...thank you for this. Such a helpful post!
ReplyDeleteThank you for sharing.
ReplyDeleteNo joke. My photographer cousin was telling me to search this LAST NIGHT so that my website would be legit! Thanks for the great tips :) Off to practice now...
ReplyDeleteAwesome tips!! thanks for sharing! This amateur photographer really appreciated it. My kids head back to school in a week so I may find the time to play around with the manual settings on my camera!
ReplyDeleteThanks so much! So helpful! Would you mind sharing your process with removing the color cast? The grey undertones are exactly what annoys me! Thanks in advance!
ReplyDeleteLove this post. I am trying to photograph all my pages, just as a worst case scenario back-up (i.e. house fire). It's always interesting to see how others works, thanks for sharing.
ReplyDeletethats a great post. I wish you could explain more about the whole process.
ReplyDeletethanks for sharing how to your photopraph!!! love your project photos, especially PL .
ReplyDeleteyou're really an awesome photographer!!! : )
Always so informative, loved taking Maggie H's photography class to learn manual mode. It's been a couple years now so always great to brush up :) would love more on the changing of shadows etc :)
ReplyDeletewow.. that is very informative to me.. thank you.. I do PL weekly so I am taking lots of layout and single card photos.. I just love others which are so clear!!! I will give this a try out.. I have a lovely Canon EOS 600D.. so no excuse.. but tips are great!!!!!
ReplyDeleteYes, I am in treated in you sharing more about getting the "gray" out!!!
ReplyDeleteThanks so much for sharing, I thought something was wrong with my camera b/c my room looks just like your with the light and my layouts are just as dark! Would love to hear about the grey undertones. Why do you stand so high above the project, and why do you keep it backwards to you? Can't wait to try out your tips, thanks!
ReplyDeleteGreat post!!! Photographing my projects is my least favorite part of the process... but it's my goal to share more of my pages... so thanks for sharing your process! I really think it will help! Beautiful spread--as always!
ReplyDeleteThank you for explaining this concept. I have a fancy camera that I am frustrated with, because no matter how I set it, it never comes out like I see it with my naked eye. I always end up doing a lot of post processing, to get the photo to "look" right!
ReplyDeleteYou are so kind to share as many of your secrets as you do Stephanie x
ReplyDeleteThank you Stephanie! I have had my Nikon D40X for 7 years and this post has finally taken me out of AUTO mode! Please tell more about removing color cast.
ReplyDelete