slider

Showing posts with label birthday. Show all posts

3/30/15

Six


Happy happy birthday to you, my sweet girl.  I can't believe you are already six.  It feels like just yesterday that you came into this world screaming your head off.  You loved to snuggle and be with anyone (especially me) since day one and that has not changed one bit.  You are smart, spunky, passionate and so kind-hearted.  You love mermaids and princesses, jewelry and dresses.   Your style is mismatched and amazing.  You have the cutest little check dimple when you laugh really hard and I smile every single time I see it.  You are an amazing reader and fly though chapter books in a few hours.  You love to play pretend, especially family, and you are usually the big sister.  Your brother is your best friend and the bond that you two have is undeniable.  You could eat cereal every meal and have never met a vegetable that you didn't love (asparagus and broccoli are your faves). 

Always stay you.  Stay sweet and spunky.  Stay silly and loving.  Stay smart and strong.  Just stay you.  Lots of love to you, my sweet baby girl. Happy day!!


7/18/14

Happy Birthday Maggie Holmes

Did you know today is the wonderful Maggie Holmes' birthday??  It sure is and her Design Team has created a fun surprise for her on her special day!!  

Each of her DT members put together a sweet little gift for Maggie and mailed it the old fashioned way!  I had so much fun putting my birthday surprise together for her and I hope she enjoyed opening it as much as I enjoyed making it!

I gave this quite a bit of thought and decided I wanted to some kind of "birthday in a box".  I created this birthday in a box for my daughter's fifth birthday, but it was kind of big and bulky.  I wanted something smaller and more delicate for Maggie!  Then I stumbled upon a pretty antique jar and knew it would be the perfect starting point for my "happy birthday jar"!  It was so cute, I almost had a hard time mailing it to Maggie!!


To decorate the jar, I made a few small tags and attached them to the jar using twine.  I also wrapped a small piece of ribbon around the lid to give it a little more feminine feel.

So are you wondering what's in this sweet little jar??


It's nothing too fancy, but it definitely screams happy birthday!!
In Maggie's jar, I included a few candles, nail polish, lip gloss and some pretty pens.  Since I was mailing this jar, I included lots of ruffled crepe paper and tulle to keep the items from tapping against the glass.


Isn't that a fun little surprise??

Happy birthday, Maggie!!  I hope you have a wonderful day full of cake and laughter!!  Oh...and be sure to stop by the rest of the Maggie Holmes' Design Team to see what they put together for her!!  You can click on their blogs below!  


6/5/14

Birthday Gift Bags

Amanda Rydell is one super crafty lady.  I have been inspired by her for quite some time now and I am so honored to work alongside her on Maggie Holmes' Design Team.  She is a breath of fresh air and always comes up with the best ideas....for example...this awesome recycled gift card holder.  Amazing, right?

This little birthday set was inspired by Amanda!  It was so easy and simple to put together and I just love that it is 100% handmade!  My sweet little girl even got in on the action and added a few little bits and pieces to our gift.


I started by adding a few Crate Paper Styleboard rub-ons to a glassine bag.  I love using glassine bags.  They are perfect for adding softness and femininity to layouts and mini albums, and they work especially well for sending cards and small gifts.  The rub-ons worked perfectly with the smoothness of the bags and the pop of gold against the white is just beautiful!

I stamped "happy birthday" using my mini alpha stamps onto an office tag and then added a few paper scraps, glittered tape and a doily to create a small adornment on the glassine bag.  

I used a piece of gold dot kraft paper from the Styleboard collection as my card.  I trimmed it to slide right into the bag and added my message on the backside (which is plain kraft paper).


I included a few small birthday surprises (balloons, candles, notes and a bracelet) in the bag and I popped it right in the mail!!  So easy and perfect!!


4/19/14

Two Peas: Milestones Project Life

I'm up in the Two Peas gallery today sharing a very fun and festive birthday Project Life spread and insert.  The theme this week is Milestones and celebrating my girls' 5th birthday is about as big as they get (to her, at least).  She counted down this day for months and months and just couldn't wait to be the big "5".  I knew I wanted to include something fun in our album to celebrate her birthday and as I got started, I realized one little spread or insert wouldn't do her or her big day justice!!


I went a little crazy and included two smaller page protectors and one 12x12 page protector.  For the first one, I uploaded a bunch of photos of her over the last year into Picmonkey and created several 4x4 collages.  You can see a quick little tutorial about how to create collages in Picmonkey here.  

I used a collage in each pocket, so I ended up with six picture collages.  Most of these photos are in our book from this year or last year, but I just think it's so awesome to have them all together in one insert.  Plus, I'm kind of in love with photo collages....


The next insert is a Design J page protector.  I loved that this page protector included square photos, and I wanted to continue that look from the first spread.  I kept this insert simple by using 4x4 photos and a few journaling cards.  I also created a confetti pocket by dumping in some punched confetti and sewing up the top.  I added a gold thicker "a" to the middle of the pocket for a pop of color and to break up that confetti a little.


This is a look at both the front and back of the insert together.  I love the overall "party" look of this insert.  It definitely screams birthday, right?


To finish out this birthday section, I wanted to include a few photos of her birthday party.  I thought about including them in another insert or spread, but I felt the first part of this section was already so busy that something "calmer" and "simpler" would be better.  I decided to print off (yet again) another photo collage and added it to the middle of a piece of white card stock.  I used some Dear Lizzy foam thickers to spell out "party" in the bottom right hand corner and called it done.  It's pretty simple, but I think it works perfectly with the craziness of the rest of this spread.


Happy Saturday!

4/4/14

The Birthday Bash

The big "5" was a big deal around here.  My sweet girl counted down the days until her birthday for months and then, as soon as that day arrived, she counted down the days until her little party.  I love birthday parties, but my way of planning them has definitely changed over the years.  I used to think out the parties months and months in advance and have everything ordered, sketched out and ready to go on party day.  Now (other than a few thoughts), I just wing it on party day.  It's not perfect, but it makes my kids super happy.  Plus, who doesn't want to have a special day just for themselves???  

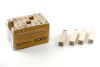
Anna and I used my craft goodies to put together a few goodie bags for the girls a few weeks before the party.  She only had three little friends over, so they didn't take much time.  And just like her momma, Anna kind of loves embellishments.  The bags are plain white square lunch bags and we added a doily, washi tape, stickers, resin flowers and buttons to the bag.  I used my uppercase alpha stamps to spell out each girls' name.  Having a few number of guests keeps this process from being too overwhelming, I think.  

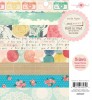
The night before the party, my husband and I made this knotted fabric garland.  I used some of the beautiful fabrics supplied by DoCrafts.  The colors and patterns screamed party and making the garland couldn't have been easier.  Even my husband loved it!

Party day was all about pancakes and pajamas.  I'm not quite sure where Anna came up with the idea, but I loved it from the minute she mentioned it.  I'm super surprised she didn't want a "Frozen" themed party since that's her favorite right now, but a non-themed party was beyond perfect in my eyes.  

We set up her tea set, added in a pretty paper flower sewn table runner (that I made from these Docraft flowers) and made a few toppers using some of the Dear Lizzy Daydreamer die cut shapes and washi tape.  

Unlike in other years, I decided to just pick up pre-made cupcakes, cookies and doughnuts from the grocery store.  It's obviously not gourmet, but I can't even begin to tell you how much time and stress this saved me.  I made the pancakes about an hour before the girls got here and just warmed them up when they were ready to eat.  I'm pretty sure we are having a pancakes for parties from now on!!  Getting everything ready beforehand was awesome.  I'm usually baking and cutting and prepping until the first guest arrives and throughout the party.   I love that I was able to enjoy the girls from the moment they were all here until the moment they left. 

After the pancakes and cupcakes were gone, we had makeovers and manicures and all the girls left with blue eyeshadow and a crazy array of sparkly fingernail polish. 

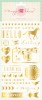
I set out a bowl of princess stickers and some pretty paper and each girl created a pretty picture while they waited their turn for a manicure.  It's amazing how many stickers they can put on sheet, isn't it??

The girls played dress up, ran in the backyard and giggled.  It was the perfect party and a wonderful day.


4/1/14

Crate Paper: Birthday Box


For my sweet daughter's birthday, I wanted to put together something fun, but small for her.  
We were actually out of town traveling over her birthday, and while we celebrated her birthday a zillion times over with family, I wanted to make sure she got something super special on her big day.  I didn't want it to be an "over the top" gift, so I picked up a few small toys and books and decided to create a birthday box for her.

A birthday box would be awesome to send to someone you don't see very often, or even someone you do.  My daughter especially loved it and I had so much fun putting it together.  

Take a look...
I used a wooden box from the craft store.  It opens on hinges and I loved that it was deep enough to hold several gifts.

I embellished with front with some simple lace, crepe paper and a few Crate embellishments.  I sewed the word bronze "Happy" onto the crepe paper for a pop of color and shine!

The box is full of little goodies, each in their own box.  The two smaller boxes on the left hand side are paper mache boxes also purchased at the craft store.  I painted them white.

I embellished the boxes with a few chipboard pieces of the Crate Paper Oh Darling collection and added a ribbon and some tulle to the wrapped books.

Inside each box is a fun little gift I know my daughter will love (and she did)!!

4/3/13

for you, darling mini album

my daughter turned the big 4 this past weekend...sigh.

we had a small little tea party with some of her friends and it was a fabulous time.  it's the first time that i haven't gone "way overboard" with the decorations, food, presents, etc.  i threw everything together the day before.  and believe it or not....it was wonderful.  no stress (other than the "day of" kind of stuff). no worry. no endless nights spent perusing pinterest for the perfect cupcake topper.  nope.  just a simple little party.

my husband and i wrapped her presents the night before the party and he mentioned to me that "next year, we should have some tags on the gifts".  well....guess what i went and did for the next hour?  made tags.  which was awesome, by the way!  :)

as soon as my daughter saw the presents (and bypassed the tags without a glance), i grabbed them up and decided to put them in our project life album.  but then i decided that they looked so awesome together that creating a mini album remembering her fourth birthday would be perfect.  

so, i made a few more tags and turned them all into a little mini.  i tried to use my scraps and things on my table rather than dragging out every little bit that i have.  for the tags....i mainly used plain office supply tags, some dear lizzy tags and these large white tags from studio calico.  for the embellishments, i used some wood veneers from studio calico and freckled fawn, doilies, dear lizzy stickers, buttons and enamel dots.

check it out...


i couldn't quite figure out how i wanted to include the journaling.  the tags are a little small to include a picture and lots of words, so i opted to type the majority of my journaling on the front and back of the first tag.  

i created a little confetti tag using some cellophane wrapper (from a packaging).  i just sewed three sides of the wrapper onto the tag, added my confetti and then sewed up the remaining side.  easy peasy. (ps...i think i will make all of my gift tags like this from now on!)


i created a couple of "fabric" tags using fabric scraps that i had in my scrap pile.  i love how they turned out and i think fabric adds so much to a paper book.


super simple.  and super sweet.  hoping the little misses will enjoy "the tags" i made for her one day.  

thanks for stopping by!!  

xoxo

3/30/13

someone is 4....


today is a very special day.
my little girl turns 4 today. sigh.
she's something else, for sure.
she loves the colors pink and purple, marshmallows, ballet, the iPad and wants to be a rockstar when she grows up.

we love you so much sweet girl.  you make everyday full of laughter.  happy day, darling.