slider

Showing posts with label gossamer blue. Show all posts

8/13/14

Project Life: Wrightsville Beach Day Trip


Adding beach photos to my Project Life album is probably my favorite.  I love the blues, greys and whites together.  And the photos are just so serene and calming.  When you have the perfect journaling cards to go along with them, well...let's just say that's a big win-win to me (thank you Gossamer Blue and Peppermint Granburg)!!


As soon as I opened this month's kits from Gossamer Blue, I knew I wanted to use the journaling cards from One Little Bird to document our day trip to the beach last month.  I kept my page pretty simple, as you can see, and let my photos speak for themselves.  I know I've said this a zillion times, but I am so glad I stuck with full sized photos this year (4x6 or 3x4).  It has made my process so much easier!!


The left side of my spread is very simple...nothing fancy at all.  Pictures and journaling cards.  All of these photos were of one day, so I didn't really feel the need to add a lot of words to my spread.  


On this side of the spread, I added more photos and several thoughts about our day.  I created a little title card "WB" using some Studio Calico wood veneer alpha, a piece of trimmed bokeh vellum from the Webster's Pages Ocean Melody kit (yep...bokeh vellum!!  Super love!) and a typed place/date.

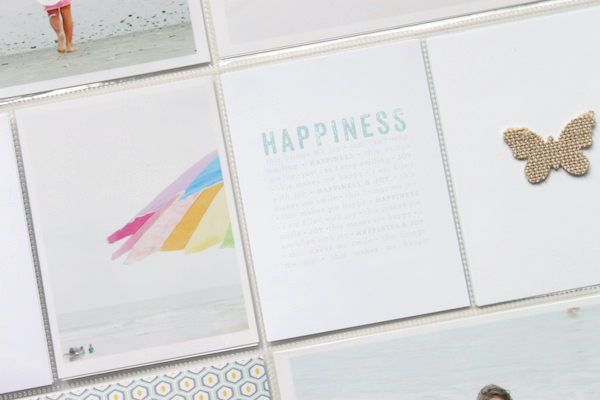
Here are a few close up shots of this spread:


There is really nothing spectacular to this at all, I know.  It took me about 15 minutes to put this whole spread together (not including printing my photos).  I love spreads like this, though.  Not just the beach photos, but the ease of the process.  Project Life shouldn't be difficult or challenging or crazy.  You can totally make it that way if you want to try something different or spice things up a little, but it shouldn't be complicated.  Creating a spread like this reminds me to enjoy the process a little more!!

7/26/14

Gossamer Blue: Creative Uses for Journaling Cards


I always try to get the most use out of my products, but sometimes my spreads are so photo heavy that I don't have a lot of leftover room for journaling cards.  Combining your cards and some common tools (think paper trimmer, circle punch, sewing machine) can stretch your supplies and help your creativity flow!


When I start organizing my photos and memorabilia for the month, I always pop a few journaling cards randomly into my pockets.  Although they may not stay in the same spot, they serve as a reminder to add in a few details about our week or month.  The rest of the cards sit in a pile by my photos and once my photos and memorabilia are in place, I grab them out and see what might work with my spread.

Let me share a few of my favorite ways to use journaling cards!


1. Trimming cards to create tags and journaling spots.

I loved the "sweet memories" sentiment on this journaling card, but I only had a few words to add to this photo, so I didn't want to use the entire card.  To make it work with my photo, I trimmed out the sentiment and used it as a journaling spot and label.  I added in one of the My Mind's Eye Chipboard banners for a little glitzy touch.


2. Using your punches to create embellishments.

For this photo, I used my circle punch to punch out part of a journaling card.  I adhered it to the middle of my photo using my tiny attacher and added my journaling with a white gel pen around the photo.  Simple, but super effective!


3. Using journaling cards as accents.

This vellum journaling card was trimmed down to fit a card that is on the other side of this pocket.  I added a flair button to the middle as an accent.  The card is a little smaller than the pocket and I love the see-through effect it has!


4. Sewing vellum to a card to create a transparent pocket.

And what's a Life Pages spread without a vellum pocket?  Here I used a journaling card and sewed on a small piece of vellum to act as a pocket to hold our Easter basket clues from the Easter bunny.  I added a small label with some journaling to the outside of the pocket to finish it off!

How fun, right?  Thanks so much for joining me today!!  I hope I have inspired you to take a closer look at those journaling cards and your supplies to get the most use out of your products as possible!!  

7/14/14

Gossamer Blue: Organizing Your Project Life Process


I have a new Project Life Process video up at Gossamer Blue.  I really loved putting this spread together and talking through my process.  The more I talk about it, the more I realize what works for me and what doesn't!!!  


7/8/14

Project Life: June 2014


This spread covers the beginning of June....lots of lazy mornings, play time, dance recitals and backyard picnics.


I used a variety of papers, cards and embellishments from the Gossamer Blue July kits.  I used several of the Crate Paper Open Road playing cards because I just love them so much, as well as several journaling cards designed by Peppermint Granberg.


Keeping with my "simple is easier" method for this Summer, I added quick journaling throughout my spread and occasionally on my photos.  There aren't a whole of words here, but I feel the pictures tell the "story" and I am super happy with that!


I cannot even begin to tell you how much of a difference it has made to print my photos the size of the pockets I'm using.  It takes all of the guesswork out of "what should I put in this pocket" and makes my spreads come together so quickly and easily!


I used the words/theme on the journaling cards to dictate my journaling since I really didn't have much else to add to the photos.  And I love that I just went with the flow and documented those thoughts rather than trying to make the cards match my photos.

Easy peasy!!  


7/4/14

Fourth of July Mini Books & Travel Kit


Happy Fourth of July!!!

Every Fourth of July, we travel to my sister-in-law's house at the lake.  All of my husband's family joins us and it's such an awesome little getaway!  My sister-in-law is the queen of party planning, so we always have different themed nights and lots of yummy foods!  The kids run and play and there's lot of fun out on the boat.  Last year it rained like crazy, so we are hoping for nicer "lake" weather this year!

2012

2013


The kids don't usually have too much down time, but I always like to pack a few activities for them to  have incase anyone really needs some quiet time (like momma!!).

Last year, I put together a few books for the kids to draw, write, paint in and they loved them, so I thought I would do something similar this year!  


I used the papers and embellishments from the July Gossamer Blue Themed Add-On to make these super simple paper albums.  The books are 4x4 inches, include several pieces of patterned paper and a piece of printer paper and are sewn together down the middle.


I used two sheets of 12x12 paper and two sheets of printer paper to make these four books shown here.  

To make these books:
 Trim your patterned paper into 4x8 inch strips
Score each paper down the middle at 4 inches
Stack your papers together
Sew or staple where your score marks are


I used the Heidi Swapp Epoxy stickers that are included in the Themed Add-On to add a title to the front of each mini book.  I kept the inside super simple since I know the kids will enjoy filling them in with pictures and drawings.


I'm taking a few embellishments, stickers and wood veneer along with us, and packed it all into a paper bag.  I'm also taking along my Instax camera so we can snap some photos and add them into the books!  I can't wait to see how each one decorates their own book!

6/13/14

Project Life: April 12 on the 12th


Although Design A is my "go-to" page protector for getting caught up and back on track, I really love experimenting with the various other designs and stepping out of my creative Project Life routine.   This spread covers 8 of the photos from my April edition of the 12 on the 12th photography project.  I really wanted to highlight each of these photos and printing them as 6x6 (Design E) makes them bold and awesome!  I'm still contemplating adding in an insert of the remaining four photos, but I haven't gotten around to that yet.  


These photos are from my husband's birthday and his party.  I love that these pages document him and his amazing love for our two kids.  I used bits and pieces from the June Gossamer Blue kits to add a few little additions to the photos, although I definitely let the pictures speak for themselves.  Since I didn't have any spaces for journaling cards, I typed my journaling directly onto my photo in the white space.  


I just love that this spread is so bold and so bright.  I love how uniform and symmetrical everything looks.  And I love that it's all about the photos.


The Mini Placemat from the June Life Pages Main Add-On was the perfect finishing touch for these pictures!

So...do you stick with the same style page protector, or do you like to mix it up!

6/12/14

Project Life: April

It's going to be Project Life overload on my blog for the rest of the week!  Yesterday, I shared my tips for getting back on track with your Project Life album and today and tomorrow, I'll be sharing two spreads from April.  Yay for being back on the Project Life wagon!  

I love to watch the pictures throughout the year evolve depending on the season.  This Project Life spread covers the beginning of April and all of the green means it's definitely Spring!


I used the June Life Pages kit from Gossamer Blue for this spread.  The colors were bright and fun, and I just love al of the space I had on the journaling cards for words, photos, etc.
I ended up with quite a bit of memorabilia this month and a lot of it made it's way into this spread.  Since I'm working on more of a monthly basis rather than weekly, I find that I actually have more bits and pieces of our life to include (either that, or I just collect a lot of junk....who knows...)


I created a pocket using a piece of vellum and a journaling card from the Gossamer Blue kit.  It was the perfect place to hold a few little clues from our Easter bunny.  I also did the majority of my journaling on the middle cards with a few little lines here and there on my photos.


I had a few extra journaling cards left over and I decided to cut them up and use them as little embellishments.  I always love to find creative uses for those journaling cards that don't get used.  Over time, those cards pile up and I never get back to them.  This is a win-win for me!  You can read more about this process on the Gossamer Blue blog.
For the picture above, I used my circle punch to punch out a sentiment and then I journaled around the tag.  Perfect!

I'll be sharing more of my April Project Life spreads tomorrow!  Just like every year, I've slacked off a bit since school has been out and have ended up a little more behind than I usually am.  I need to get to work!

5/7/14

Gossamer Blue: Using Cut Files as Photo Overlays


I'm on the Gossamer Blue blog this week sharing a fun way to utilize those cut files and printables that are included with your Gossamer Blue kits each month!  :)

I put together a video walking you through my process for using these files as photo overlays.  They have a similar effect to a digital brush and are just so fun to play with.  


Here's a look at my completed Life Pages spread.  I love how the overlays and files I added to my photos add such a soft and simple effect to my spread.


I hope you will try this fun technique!!  As always, please let me know if you have any questions or if I can help in any way!!


5/1/14

Project Life: April

I had so much fun putting together these Project Life spreads this month.  I used the awesome May Gossamer Blue kits and the designs and colors were just perfect for this time of year!!

I wanted to do something different and definitely mixed things up for me.  Breaking out of that "design A" mold from last year has been the best thing for me.  I love being able to think outside the box and get creative.  Don't get me wrong, though!  I'm still a big fan of Design A and frequently find myself floating back to it when I put my spreads together.  

For this first spread, I really wanted to use all of these photos of my daughter.  We were playing around with her rabbit ears one day and snapped a bunch of cute bunny photos of her.  Every single images makes me smile and I couldn't imagine trying to pick just one. 


I printed the photos to look like Polaroid images and then added them to the front side of a Design F page protector.  This page protector has ten 3x4 slots and one 4x6 slot.  I trimmed off the far right side and then sewed the 4x6 slot down the middle to give me twelve 3x4 spaces.  I didn't add many embellishments because I wanted the photos to speak for themselves, but I couldn't resist the Heidi Swapp "cuteness" script sticker and a heart flair button!!

Since the front side was pretty photo heavy, I decided to stick with a neutral, simple back page.  I used a piece of patterned paper from the Gossamer Blue kits and trimmed the 12x12 page down to 3x4 cards.  Then I slipped them behind my photos and added a small flair to the middle of the page.  


This spread was inspired by Elisa Cripe's 2014 title page.  I loved the way she incorporated triangles into her spread and have been waiting for the perfect photos and journaling cards to try this technique.  This was quite a labor intensive spread, but I do love the way it turned out!!


I started by designing a 3x4 photo card in Photoshop that had two triangular layers for my photos.  Once they were printed, I trimmed them out and then chose a few of my favorite Gossamer journaling cards from this month!  The cards in the Gossamer Blue Life Pages kit had the perfect orientation of phrases/colors/designs to trim them on a diagonal.


I left a few photos empty and added some sequins and stickers.  I love that transparent effect throughout my book!


So fun!!

I have one additional Project Life spread that I made with the May Gossamer kits!  It's a fun tutorial and I can't wait to share!

Happy Thursday!!